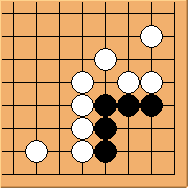
Black has no external liberties but hanes at both sides. Can white do anything?
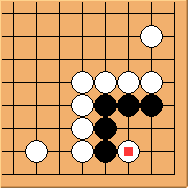
We will now consider the Carpenter's corner with one extra liberty as well as one first-line stone.
Black has one extra stone at . Does it help?
White has the option to hane from the 1st line. Black needs to be very careful not to get tricked.
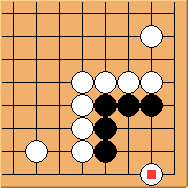
Following the previous article, we will discuss alternative ways for white to attack the corner.


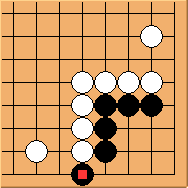
 . Does it help?
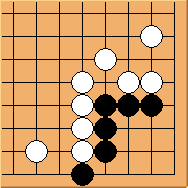