All you need to know about Carpenter's Square - 28
Submitted by macelee on 2013-02-14 09:35; Last upda
ted on: 2013-02-16 15:53
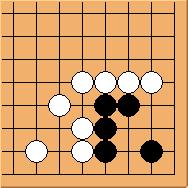
Diagram 28.1: White to play
Can the external liberty make any difference?
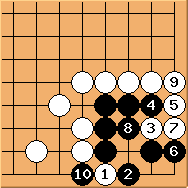
Diagram 28.2: White fails
The external liberty is clearly helpful. If white applies the solution of Shape 27, black is able to play  so the corner is alive. White has to change strategy.
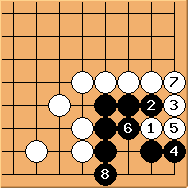
Diagram 28.3: White fails
 is the key point. However,
  is incorrect.
  is again a calm move. Black is alive. If mistakenly plays at
  first, then a ko fight in inevitable.
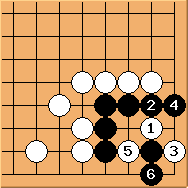
Diagram 28.4: White fails
doesn't work either. is good. Please verify the corner is alive.
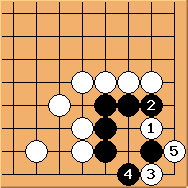
Diagram 28.5: Solution
is a brilliant move, forming a ko fight easily.

Diagram 28.6: Variation
is useless. Black can only create a different ko fight, which is favourable for white because white takes the ko first.
Conclusion: Diagram 28.5 is the best for both sides.
