All you need to know about Carpenter's Square - 27
Submitted by macelee on 2013-02-12 13:07; Last upda
ted on: 2014-05-08 13:05

Diagram 27.1: White to play
Can  secure this corner?
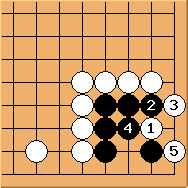
Diagram 27.2: White fails
 appears to be important, but
  can only start a ko here.
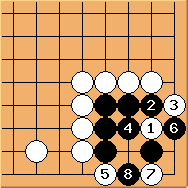
Diagram 27.3: White fails
has the option to fight an alternative ko. This way white takes the ko first which is a slight improvement.
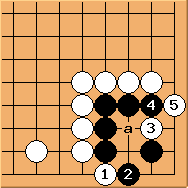
Diagram 27.4: Solution
Making /  exchange first is the correct order. Then white can come back to the key point
  and kill the corner - black cannot play 'a'.
Conclusion: Diagram 27.4 is a simple and elegant solution.
