All you need to know about Carpenter's Square - 19
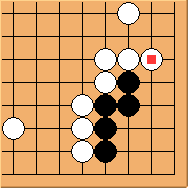
Diagram 19.1: White to play
 poses a serious threat to the corner. Black should not have ignored it. How can white punish black?
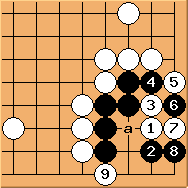
Diagram 19.2: Solution 1
 is still urgent. Unlike in Diagram 18.5,
  no longer works.
  can simply connect back home. While
  is a tesuji, blcak cannot play 'a'. So the corner is dead.
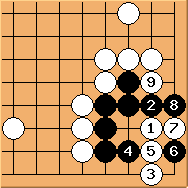
Diagram 19.3: Variation
So has to block here. is a nice tesuji. Readers may remember from earlier experience (e.g. Diagram 2.3, 3.3, 4.3, etc.) that once white forms an eye in the corner, black would be in trouble unless there are plenty of external liberties. This Eye versus No Eye race is hopeless for black. Also note that if plays  or *w9*, white still replies at .
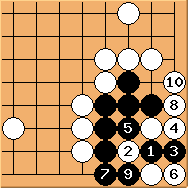
Diagram 19.4: Variation
We've seen  tesuji before. Just to show it doesn't work here and prepare the discussions in the next article.

Diagram 19.5: Solution 2
Unlike in Diagram 18.7, also works. This is because with the help of , white can reach  now, reducing black's eyespace. In the end 'a' and 'b' are miai points so black is dead too.
Conclusion: Black can not survive.
